|
|
Manage Employee Groups
Employee Groups are basically a logical grouping of the employees based on certain criteria such as shifts, departments, seniority, etc. Invixium recommends that each employee be a part of at least one Employee Group.
Groups are also used for multi-user authentication. Each group created in IXM WEB must be present in every device (which supports Groups) registered in IXM WEB. Other options like Add, Delete and Transfer groups are available.
The administrator can create groups for different departments and add users to these groups. The purpose of creating an Employee Group is to provide access or restrict access to users.
Screen Layout of Groups
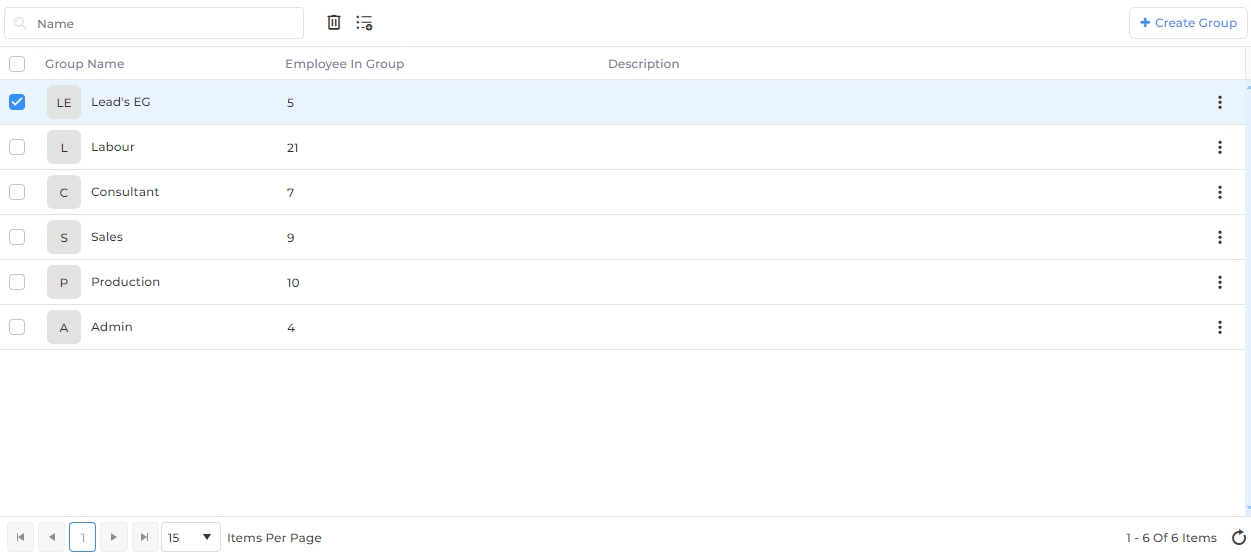
Field Description of Groups
A list of already defined Groups will be displayed. In case not a single Group has been added yet, this list will be blank.
Search:
You can search for a particular Group by entering its full or partial name. Once entered, either press <Enter> key or click on Search button. The list will be refreshed with Groups matching with the entered name.
Click on the Employee Group to view a list of Employee(s) belonging to the group as follows:
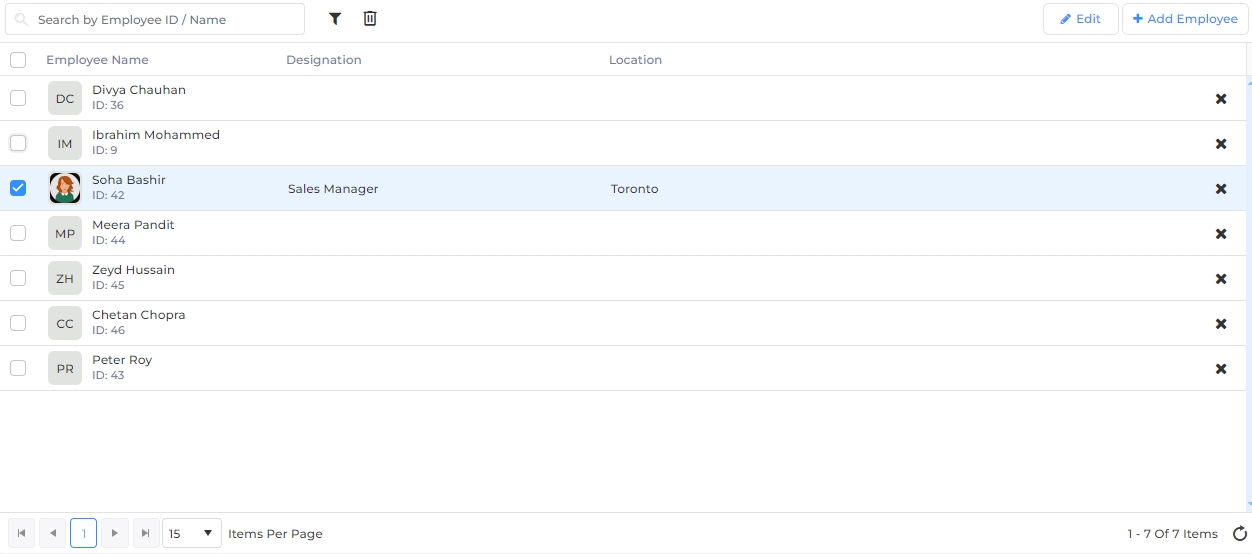
Search:
You can search for a particular Employee by entering their full or partial name / ID. Once entered, either press <Enter> key or click on Search button. The list will be refreshed with Employees matching with the entered name / ID.
To filter Employees, click on the  icon next to the Search box to view specific Employees.
Click on the  button to edit the selected Employee Group. Read more...
Click on the  button to add Employee(s) to the selected Employee Group. Read more...
To remove a particular Employee from the selected Employee Group, click on the x icon in the end of the row. The Employee(s) will be removed from the Employee Group. Alternatively, select Employee(s) by checking their respective boxes, then click on the  icon next to the Search box at the top of the list. A confirmation message will be displayed. On the confirmation message, click on the Selected button to remove the checked Employee(s) from the Employee Group. Click on the All button to remove all Employee(s) from the Employee Group.
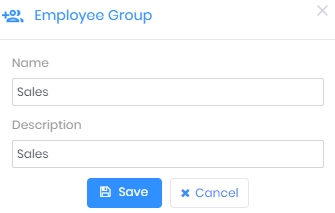
In the Employee Group list, click on the  button on the top right side of the screen to add a new Employee Group. To edit an Employee Group, hover the mouse over the Group and click on the
  button in the end of the row. The following screen will be displayed -
|
Name:Enter the Name of the Employee Group. It should not already exist.
Description:Enter the Description of the Employee Group.
Once entered, click on Save button to save the details. As a result, the application will show a success message and the Employee Group will be added / updated in the list of Employee Groups.
Click on Cancel button to discard the action. |
 icon at the end of the row. In the menu, click on the Delete option. icon next to the Search box at the top of the list.
The application will display a confirmation message. Click on Delete button to delete the selected Employee Group or Cancel button to discard the action.
Upon completion, the application will display a success or failure status message as follows -
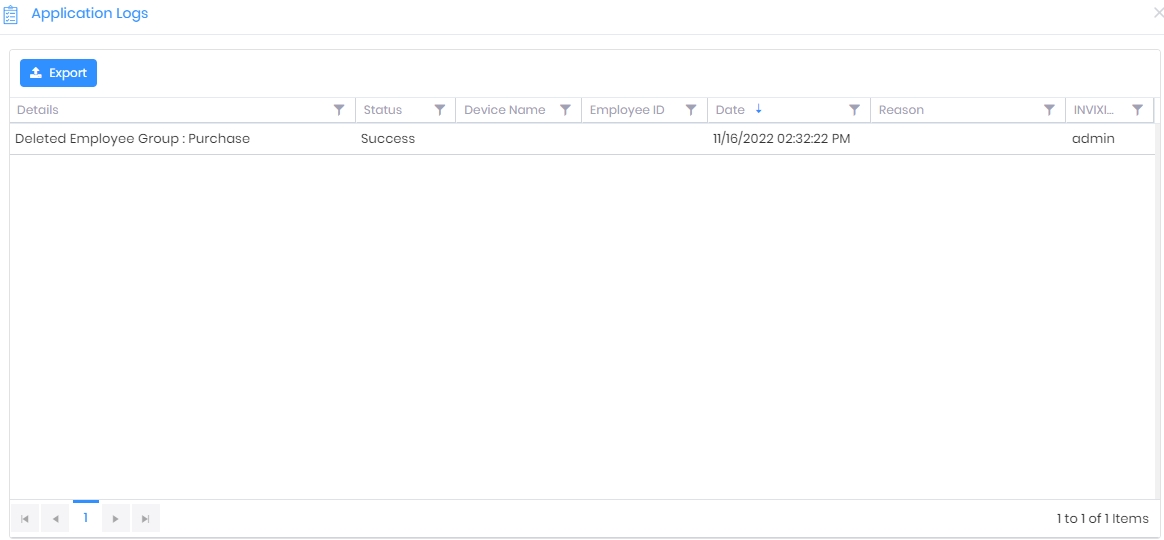
The deleted Employee Group will be removed from the Employee Group List.
|
NOTE An Employee Group can not be deleted if it contains Employees. To delete such a Group, first remove all the Employees from that Group.
|
Select the required Employee Group(s) from the Employee Group list and click on the icon at the end of the row. In the menu, click on the Add Employee option to add Employee(s) to the selected Employee Group(s)
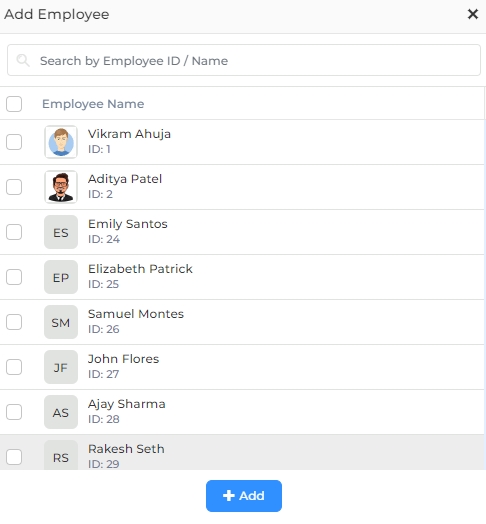
Check the boxes of respective Employee(s) and click on the Add button. The Employee(s) will be added to the selected Employee Group(s).
icon at the end of the row. In the menu, click on the Assign option. icon next to the Search box at the top of the list.
Following screen will be displayed -
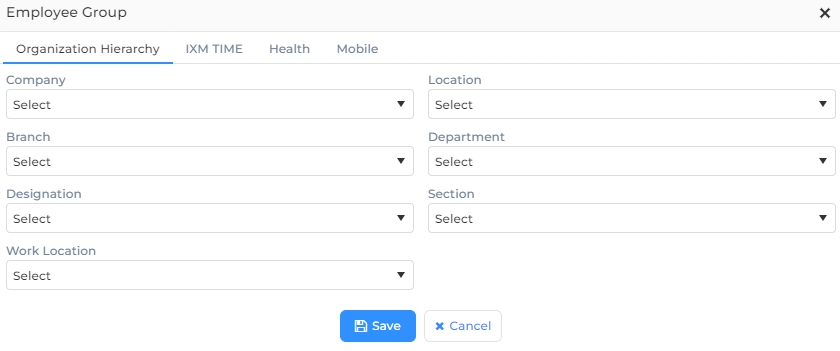
Organization Hierarchy
Company:
Select the Company from the dropdown list. Selected Company will be assigned to all Employees of the Group. You can keep it blank.
Branch:
Select the Branch from the dropdown list. Selected Branch will be assigned to all Employees of the Group. You can keep it blank.
Designation:
Select the Designation from the dropdown list. Selected Designation will be assigned to all Employees of the Group. You can keep it blank.
Work Location:
Select the Work Location from the dropdown list. Selected Work Location will be assigned to all Employees of the Group. You can keep it blank.
Location:
Select the Location from the dropdown list. Selected Location will be assigned to all Employees of the Group. You can keep it blank.
Department:
Select the Department from the dropdown list. Selected Department will be assigned to all Employees of the Group. You can keep it blank.
Section:
Select the Section from the dropdown list. Selected Section will be assigned to all Employees of the Group. You can keep it blank.
IXM Health
Enable Mask Detection:
It denotes whether the mask authentication is required or not for Employees of the Group.
Mask settings are configured at two levels in IXM WEB -
on Device level
on Employee level
The mask settings of an Employee supersedes the mask settings of a Device. This allows to enable or disable mask authentication for certain individuals irrespective of Device settings.
If the Mask Detection is enabled for an Employee and Mask Authentication is also enabled on the Device, then the mask authentication becomes compulsory for that Employee. The Device will not allow access until a mask is detected.
If the Mask Detection is disabled for an Employee then the Device will not check for mask even if Mask Authentication is enabled on that Device.
Select the appropriate option from the dropdown list to enable or disable Mask Detection for all Employees of the Group. You can keep it blank.
Enable Mask Detection Rule:

This rule is applicable only when Mask Detection is enabled.
It denotes the action that should be performed when the Mask Detection is enabled but the mask is not detected.
Select the Mask Detection Rule from the dropdown list. The selected rule will be assigned to all Employees of the Group. You can keep it blank.
If the Mask Detection Rule is set to "None", the Device Access Rule will be applicable.
If the Mask Detection Rule is set to "Allow on Fail", then the Device will allow access to the Employee even if the mask is not detected.
If the Mask Detection Rule is set to "Deny on Fail", then the Device will deny access to the Employee if the mask is not detected.
Once you have entered all the details, click on Save button to save details in the IXM WEB database. Upon doing so, IXM WEB will display a success or failure message.